一些网友表示还不太清楚Win10专业版cpu降频如何关的相关操作,而本节就介绍了Win10关闭cpu降频设置方法操作,还不了解的朋友就跟着小编学习一下吧,希望对你们有所帮助。
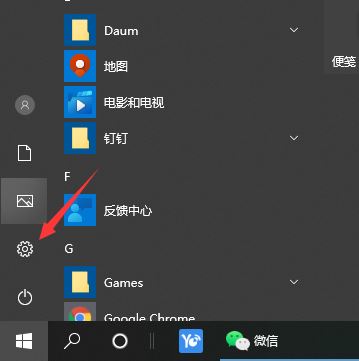
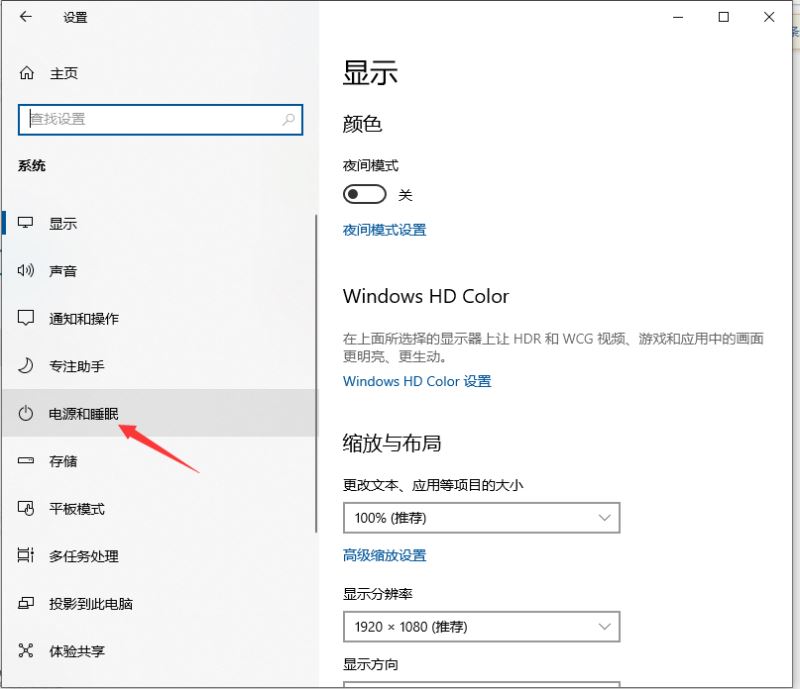
1、点击设置按钮。
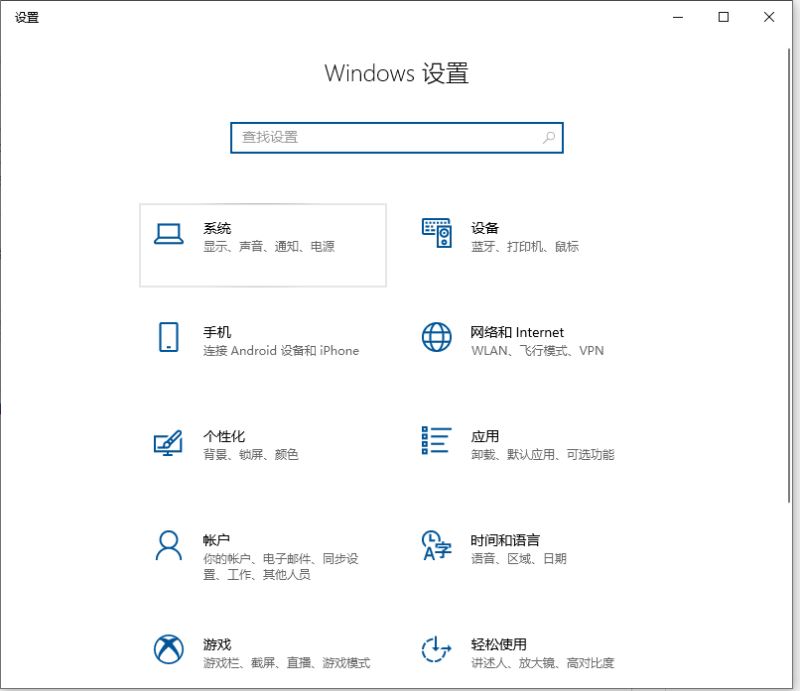
2、在弹出的对话框中,选择系统。
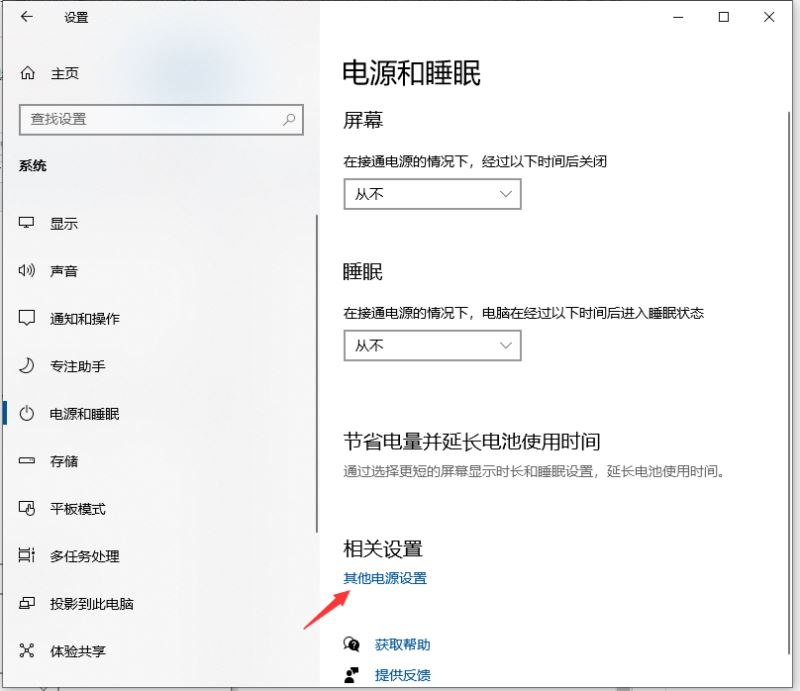
3、选择电源和睡眠。
4、点击其他电源设置。
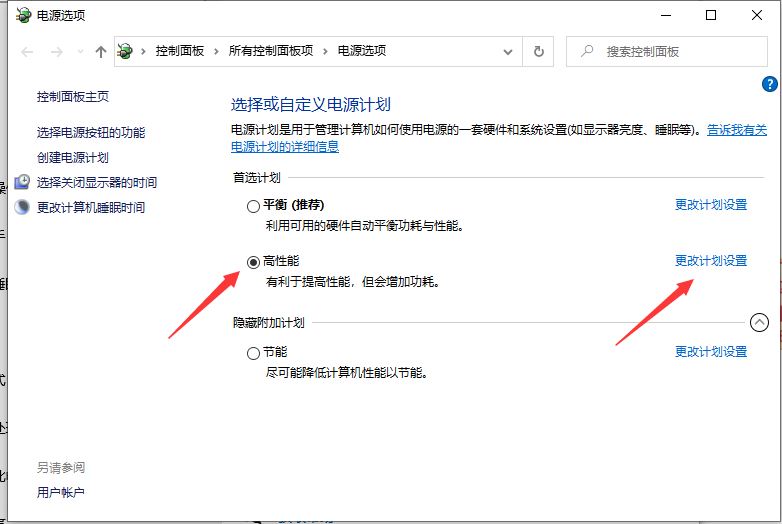
5、选择高性能,让CPU能处于最佳性能状态;点击更改计划设置。
6、点击更改高级电源设置。
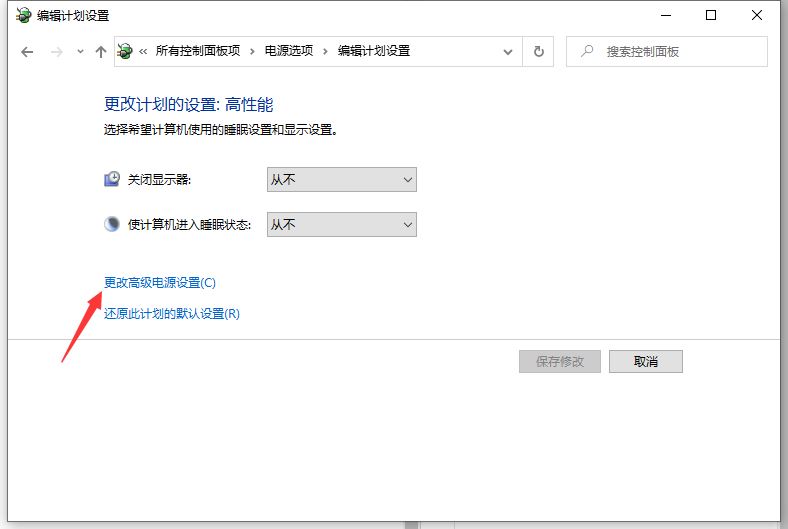
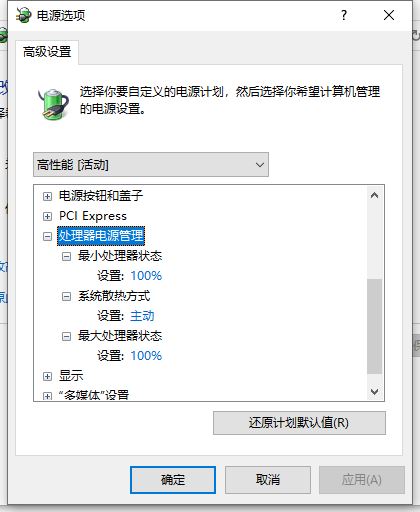
7、找到处理器电源管理,将最小处理器状态设置为100%,系统散热方式设置为主动,最大处理器状态设置为100%。这样设置完后,cpu就不会自动降频了。
以上这里为各位分享了Win10关闭cpu降频设置方法。有需要的朋友赶快来看看本篇文章吧!