我们使用ps绘制出一个矩形后,如果还想给矩形添加锯齿边缘,该怎么制作呢?其实很简单,下面小编就将ps制作锯齿边缘矩形方法分享如下,感兴趣的朋友朋友不要错过哦。
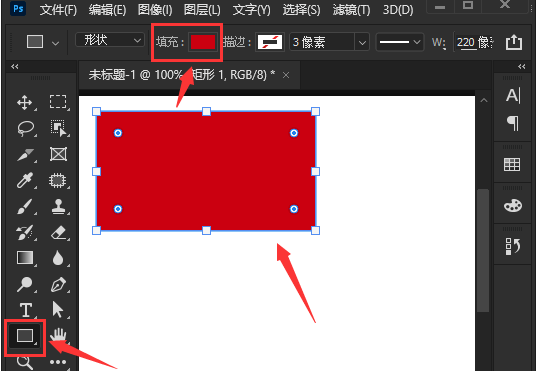
1.首先,在电脑上打开ps界面,点击矩形工具绘制一个红色填充矩形
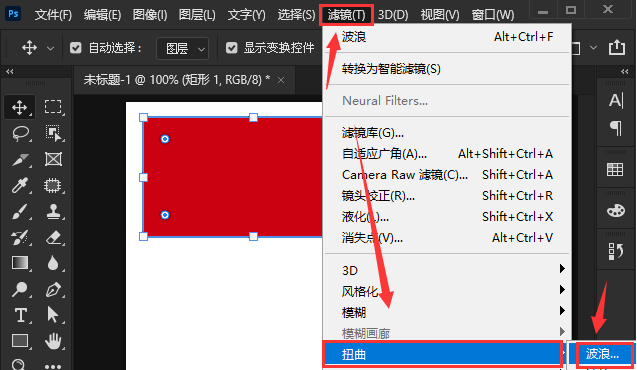
2.然后,鼠标点击选中矩形,找到滤镜菜单中的扭曲选项,选择波浪效果
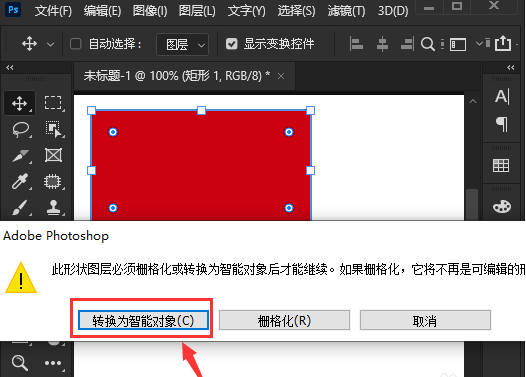
3.接着,在弹出的弹框提示中选择转换为智能对象按钮
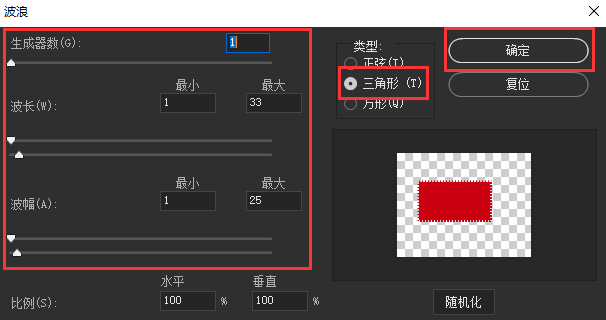
4.随后,在波浪设置窗口中,将类型修改为三角形,适当修改参数后点击确定保存
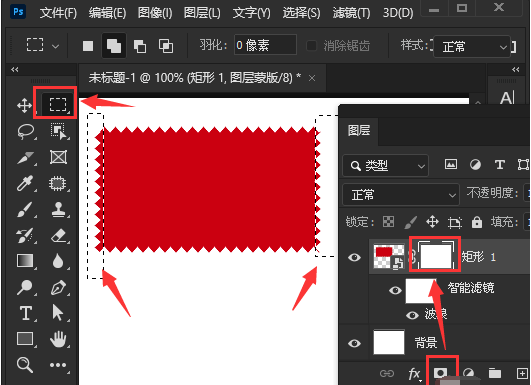
5.最后,在图层面板中,为矩形图层添加蒙版,并用矩形选框工具裁剪矩形左右两边的锯齿部分就可以了
ps制作锯齿边缘矩形方法小编就分享到这里了,希望能够对大家有所帮助哦。