premiere怎么使用录音轨道呢,话说不少用户都在咨询这个问题呢?下面就来小编这里看下pr视频录制画外音的技巧步骤吧,需要的朋友可以参考下哦。
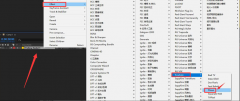
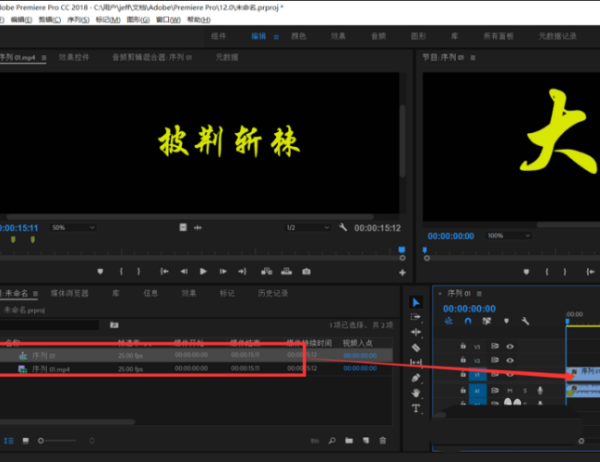
1、首先打开premiere cc软件进入项目页面,点击打开素材按钮或者双击素材面板空白处导入素材。
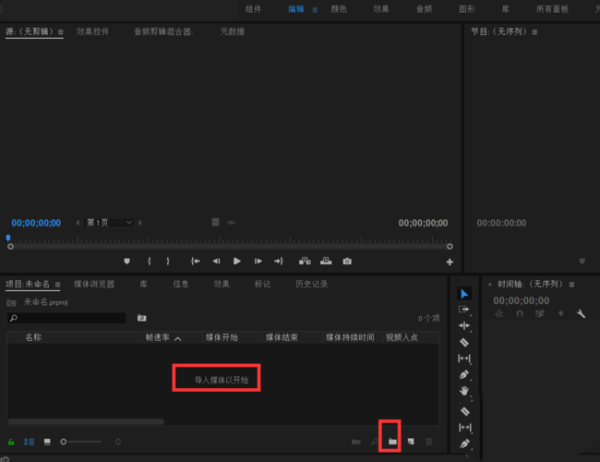
2、将视频拖动到时间轨新建序列,或者点击新建图标新建新序列。
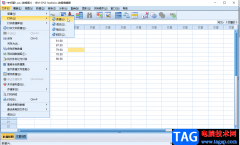
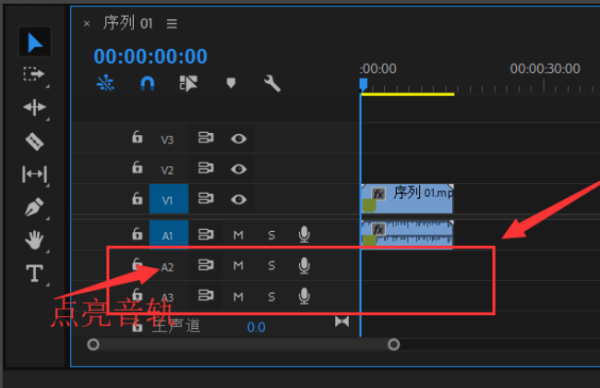
3、可以看到下面 A 开头的轨道就是声音轨道,先点亮要录制声音的轨道,这里点击A2,变为蓝色就好了。
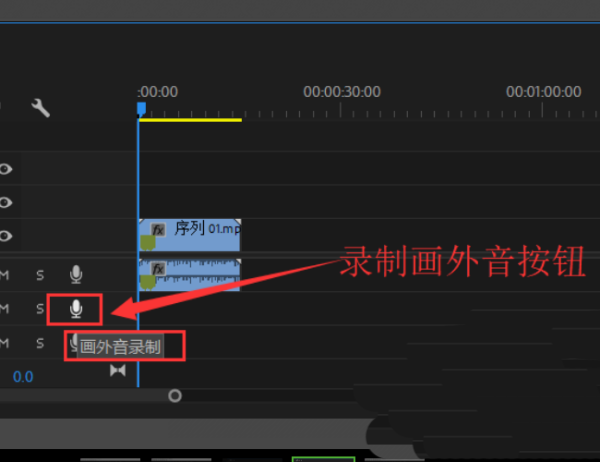
4、然后点击麦克风样式图标按钮,也就是画外音录制开关。
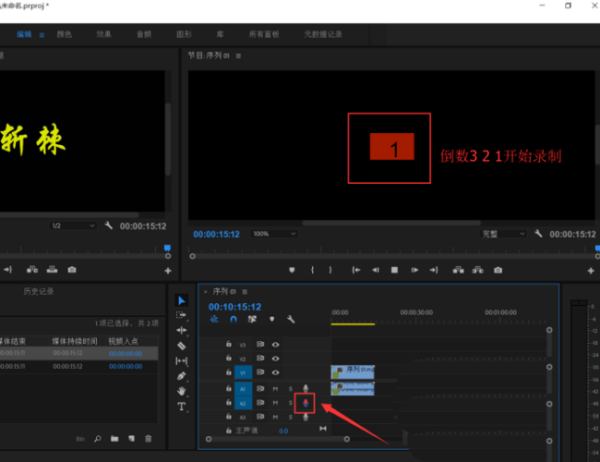
5、当麦克风图标变为红色,节目面板上出现倒数的 3 2 1开始录制。
6、录制完成可以点击编辑窗旁边的工具对录音进行简单的处理。完成以上设置后,即可在premiere cc软件中启动录音轨道。

以上就是pr视频录制画外音的技巧,希望大家喜欢哦!